Honeynet Scan of the Month
by Jeff Wichman
![]()
The Challenge:
The folks from Digital Forensic Research
WorkShop have created a unique challenge for you. Your mission is to
analyze a recovered floppy and answer the questions below. What makes this
challenge unique, you will need to read the police report
before continuing your challenge. Just like an investigation in the real world,
you will have some background information and some evidence, but its up to you
and your technical skills to dig up the answers. Below is the dd image of the
recovered floppy. This is the image that will provide you the answers,
providing you can 'extract' the data.
Tools utilized in this analysis:
Autopsy version 1.62 from @Stake
Task version 1.52 from @Stake
Download image from Honeynet
wget http://project.honeynet.org/scans/scan24/image.zip
--22:55:08--
http://project.honeynet.org/scans/scan24/image.zip
=>
`image.zip'
Resolving project.honeynet.org... done.
Connecting to project.honeynet.org[63.107.222.112]:80...
connected.
HTTP request sent, awaiting response... 200 OK
Length: 18,146 [application/zip]
100%[====================================>] 18,146 203.69K/s ETA
Compare the md5 value:
md5sum image.zip
b676147f63923e1f428131d59b1d6a72
image.zip
Unzip the image:
unzip image.zip
Archive: image.zip
inflating: image
Take away write access to the file
as an additional precaution:
chmod -w image
Run strings on image to get disk
information for Autopsy / Task setup:
strings image
MSDOS5.0
NO NAME FAT12 3
Edit the fsmorgue file to read image
information with Autopsy:
# fsmorgue file for Autopsy Forensic Browser
#
# image img_type mount_point time zone
image fat12 a: EST5EDT
Launch Autopsy and begin analysis:
./autopsy -m /tools/forensics/task-1.52/morgue -l
/tools/c-scene -i "Jeff Wichman" 8888 localhost
===============================================================================
Autopsy
Forensic Browser
ver 1.62
===============================================================================
Morgue: /tools/forensics/task-1.52/morgue
Start Tie: Thu Oct 24
Investigator: Jeff Wichman
NOTE md5.txt does not exist for image integrity checks
Paste this as your browser URL on localhost:
http://localhost:8888/36623860031479486342/autopsy
Keep this process running and use <ctrl-c> to exit
Opening the URL begins the Autopsy Forensic Browser (Figure 1.1):
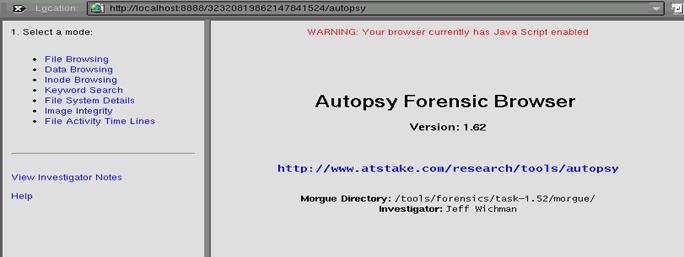
Figure
1.1
Notes and Steps taken during
investigation:
One of the first things done was to generate an MD5 value of
the image. (Figure 1.2) This was done to provide the investigator
the ability to perform integrity checks during and after the
investigation. The MD5 values were used
throughout the course of the investigation to verify that the image, files, and
reports were not altered.
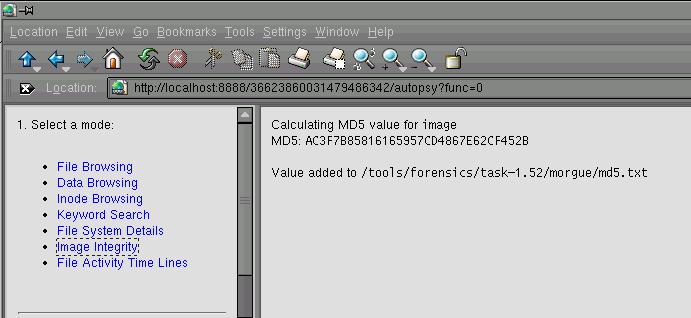
Figure 1.2
After generating the MD5 value the investigation is ready to
begin analyzing the image. Figure 1.3 shows the available images that Autopsy has available to
work with. This information was setup
earlier when we edited the fsmorgue file.
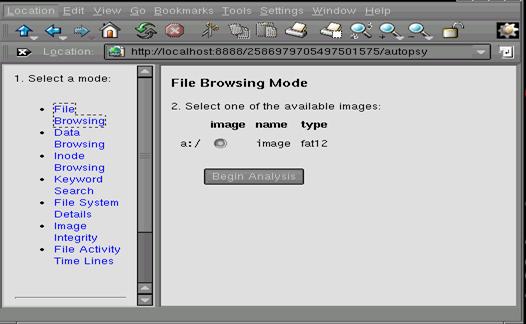
Figure
1.3
After selecting the image to work with, Autopsy takes us to
our previous selection which in this case was File Browsing. Figure 1.4 shows the files that Autopsy was able to find on the
image. Autopsy recovers basic file
information such as name, size UID, GID, Inode for the files, and various time
stamps on the files. Autopsy was able to
determine that one file was deleted as shown in Figure
1.4 that was
named Jimmy Jungle.doc. Armed with the
information on the three files that were found, we begin to extract any data we
can from the files.
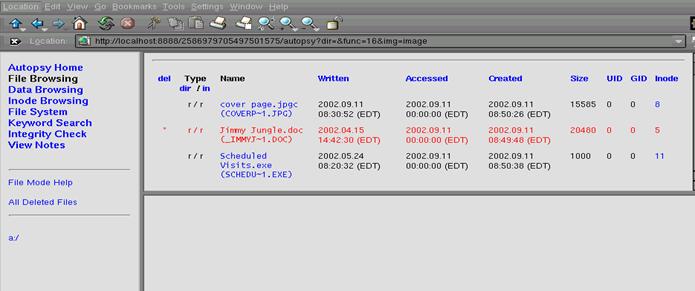
Figure
1.4
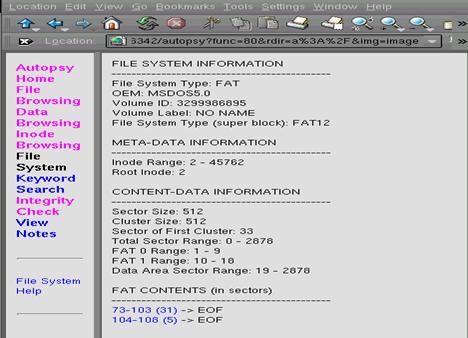
Selecting the File System menu option, Autopsy shows the
file system details and the FAT Contents that can still be easily
recovered. The File System option gives
us the details as shown in Figure 1.5.
Notice the two items at the bottom of the main window showing the FAT
Contents. This is where two of our files
that we are attempting to recover and begin with the first item 73-103 (31) à EOF.
Figure
1.5
Examining the contents in the sectors 73-103 can be seen in
the reports hex-sector73.doc and strings-sector73.doc. Each report details the data contained in the
sectors along with MD5 values for the information. After examining the hex-sector73.doc we were
able noticed a string “pw=goodtimes” and ran a separate report on Sector 103 (hex-sector103.doc) to add that information
to our case notes. Since pw commonly
stands for password a file we want to examine may be password protected. We can see from the Autopsy window that the
file type is “JPEG image data, JFIF standard 1.01; resolution (DPI), 96 X
96” We know the image contains a
coverpage.jpgc file so the suspect may have altered the file extension to hide
the JPEG file. We now use Autopsy to
export the data into a raw file (Figure 1.6) so we can use an image view to
examine what the file contains. To
determine what type of program created the file coverpage.jpg we want to
examine sector 72. The information in
sector 72 is part of the file’s properties that contain hidden data such as
what application created the file.
Please see hex-sector72.doc
for the Autopsy String Sector Report for MD5 values and verification to what
application created the image.

Figure 1.6
Returning to the File System menu option we can examine the
contents of sectors 104-108(5) and generate the
reports hex-sector104.doc and strings-sector104.doc. From the File details window we can see the
file type: Zip archive data, at least v2.0 to extract. Using Autopsy we can export the file to image-Sector104.raw and begin
examining the file. Dropping to a
console window we can unzip the file and were prompted for a password. Going back into the notes we see a password
from Sector 103 that was “goodtimes” and use the password here to determine if
this is the password to unlock the file.
The password works and the file Scheduled Visits.xls is extracted from
the archive. Now running strings on the
file produces a list of additional schools that the suspect has been
visiting. The output from running
strings on the Scheduled
Visits.xls can be found in strings-Sch-visits.doc. We see that the suspect has been targeting
the following schools:
ü
ü
ü
ü
ü
ü
The only file that remains to be examined was the file marked
for deletion and to examine that file we first found the sectors that contained
the file and ran a report on both sectors (hex-sector38.doc and hex-sector39.doc). As you can see from the reports we were able
to obtain the suspects suppliers name and address as well as a letter that was
written from the suspect to the supplier.
After completion we ran MD5 against the image and files we
had generated to make sure nothing had been altered during the investigation.
Questions:
- Who is Joe Jacob’s supplier of
marijuana and what is the address listed for the supplier?
Jimmy Jungle
626 Jungle Ave. Apt2
- What crucial data is available
within the coverpage.jpg file and why is the data crucial?
The image file states that
Jimmy Jungle is this month’s featured seller.
It is also implying that there are others who are selling marijuana
which makes it a possible network of dealers/sellers.
- What (if any) other high
schools besides Smith Hill does Joe Jacobs frequent?
The list of other schools
that the suspect had scheduled visits to are:
- For each file, what processes
were taken by the suspect to mask them from others?
Jimmy Jungle.doc was marked
for deletion.
The cover page file had the
file extension changed from .jpg to .jpgc
The scheduled visits.exe
was password protected. (Password was goodtimes)
- What processes did you (the
investigator) use to successfully examine the entire contents of each
file?
The processes are described
above
- What Microsoft program was used
to create the Cover Page file? What
is your proof (Proof is the key to getting the question right, not just
making a guess).
The cover page file was
created with Microsoft Word Version 8.0.
The proof is found by examining the FAT content sector immediately
before the sectors that contain the coverpage.jpg (73-101) file.